# Client (alle Plattformen) - Anleitung zum selber kompilieren
Dieser Guide stellt Grundlagen dar, die es braucht, um das Borepin-Projekt auf verschiedenen Betriebssystemen auszuchecken und erfolgreich zu kompilieren. Alle weiteren Details zum Umgang bedürfen Grundkenntnissen der Programmier- und Entwicklungstätigkeit mit C#, UWP, MAUI/Xamarin, Prism und Co.
## Unter Windows
Für die Kompilierung des FabAccess Clients Borepin benötigen wir verschiedene Komponenten:
### Installation von Mono GTKSharp
Mono wird nicht mehr weiterentwickelt. Wir nutzen das letzte Release 2.12.45 vom 14.11.2022
- Releases: [https://github.com/mono/gtk-sharp/releases/](https://github.com/mono/gtk-sharp/releases/)
- Direkter Downloadlink: [https://github.com/mono/gtk-sharp/releases/download/2.12.45/gtk-sharp-2.12.45.msi](https://github.com/mono/gtk-sharp/releases/download/2.12.45/gtk-sharp-2.12.45.msi)
### Installation von Cap'n Proto
#### Variante 1
Downloads: [https://capnproto.org](https://capnproto.org/install.html#installation-windows)
Nach dem Entpacken muss das Verzeichnis mit den Executables per in Umgebungsvariable `%PATH%` eingebunden werden, zum Beispiel `C:\Program Files (x86)\capnproto-c++-win32-1.1.0\capnproto-tools-win32-1.1.0`:
[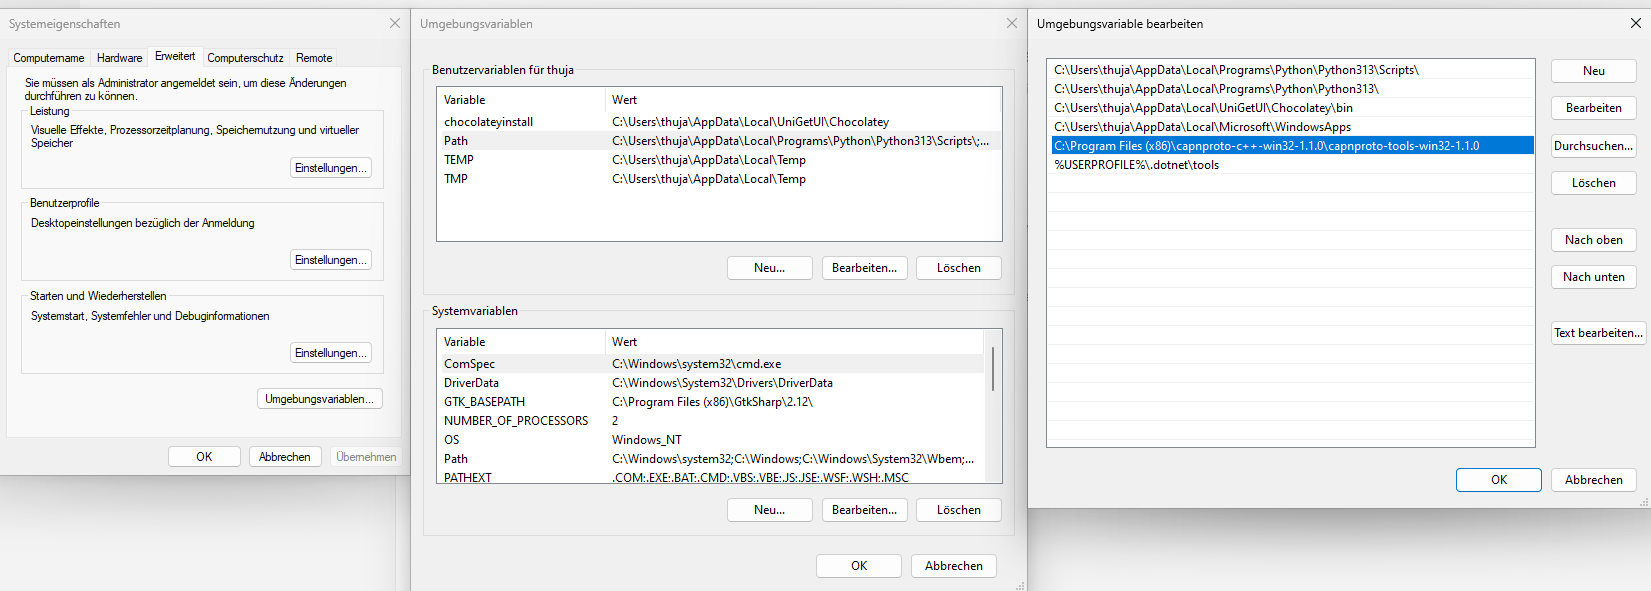](https://docs.fab-access.org/uploads/images/gallery/2024-12/pEJmZLJfhslfh6m9-grafik.png)
#### Variante 2
Installation mit [Chocolatey](https://chocolatey.org/install). Chocolatey selbst kann zum Beispiel über die Windows Shell (`cmd.exe`) oder PowerShell ([`powershell.exe`](https://docs.chocolatey.org/en-us/choco/setup/#install-with-powershell.exe)) installiert werden, oder auch über das praktische Update-Utility [UniGetUI](https://github.com/marticliment/UniGetUI) (wird automatisch mitinstalliert).
```kotlin
choco install capnproto
```
Ausgabe von chocolatey
```powershell
PS C:\Users\thuja> choco install capnproto
Chocolatey v2.2.2
Directory 'C:\Users\thuja\AppData\Local\UniGetUI\Chocolatey\lib' does not exist.
Installing the following packages:
capnproto
By installing, you accept licenses for the packages.
Progress: Downloading capnproto 1.0.2... 100%
capnproto v1.0.2 [Approved]
capnproto package files install completed. Performing other installation steps.
The package capnproto wants to run 'chocolateyinstall.ps1'.
Note: If you don't run this script, the installation will fail.
Note: To confirm automatically next time, use '-y' or consider:
choco feature enable -n allowGlobalConfirmation
Do you want to run the script?([Y]es/[A]ll - yes to all/[N]o/[P]rint): y
Downloading capnproto
from 'https://capnproto.org/capnproto-c++-win32-1.0.2.zip'
Progress: 100% - Completed download of C:\Users\thuja\AppData\Local\Temp\chocolatey\capnproto\1.0.2\capnproto-c++-win32-1.0.2.zip (4.41 MB).
Download of capnproto-c++-win32-1.0.2.zip (4.41 MB) completed.
Hashes match.
Extracting C:\Users\thuja\AppData\Local\Temp\chocolatey\capnproto\1.0.2\capnproto-c++-win32-1.0.2.zip to C:\Users\thuja\AppData\Local\UniGetUI\Chocolatey\lib\capnproto\tools...
C:\Users\thuja\AppData\Local\UniGetUI\Chocolatey\lib\capnproto\tools
ShimGen has successfully created a shim for capnp.exe
ShimGen has successfully created a shim for capnpc-c++.exe
ShimGen has successfully created a shim for capnpc-capnp.exe
The install of capnproto was successful.
Software installed to 'C:\Users\thuja\AppData\Local\UniGetUI\Chocolatey\lib\capnproto\tools'
Chocolatey installed 1/1 packages.
See the log for details (C:\Users\thuja\AppData\Local\UniGetUI\Chocolatey\logs\chocolatey.log).
```
**Achtung**: Die installierte Visual Studio Umgebung ist ca. 25-35 Gigabyte groß und die Installation dauert u.U. über eine Stunde!
### Installation von Multilingual App Toolkit v4.1 (VS 2022+) für Visual Studio
Zum Internationalisieren von Borepin können wir das Multilingual App Toolkit nachinstallieren: [https://marketplace.visualstudio.com/items?itemName=dts-publisher.mat2022](https://marketplace.visualstudio.com/items?itemName=dts-publisher.mat2022)
[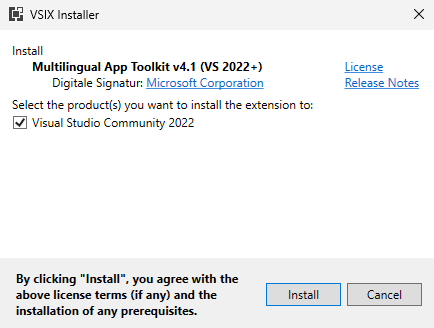](https://docs.fab-access.org/uploads/images/gallery/2024-12/wipVHH26NyKybFwY-bildschirmfoto-20241229-175848.png)
### Borepin Projekt mit Git klonen
An einem geeigneten Ort das Projekt auschecken.
```bash
git clone https://gitlab.com/fabinfra/fabaccess/borepin.git --recurse-submodules
git checkout main
```
### Projekt kompilieren
Wir öffnen die Datei `Borepin.sln` im Hauptordner des Projektes. Beim ersten Start von Visual Studio werden u.U. verschiedene Dependencies nachgeladen. Das kann ein Weilchen dauern.
[](https://docs.fab-access.org/uploads/images/gallery/2024-12/8seh7FZ5F9I0dlj8-grafik.png)
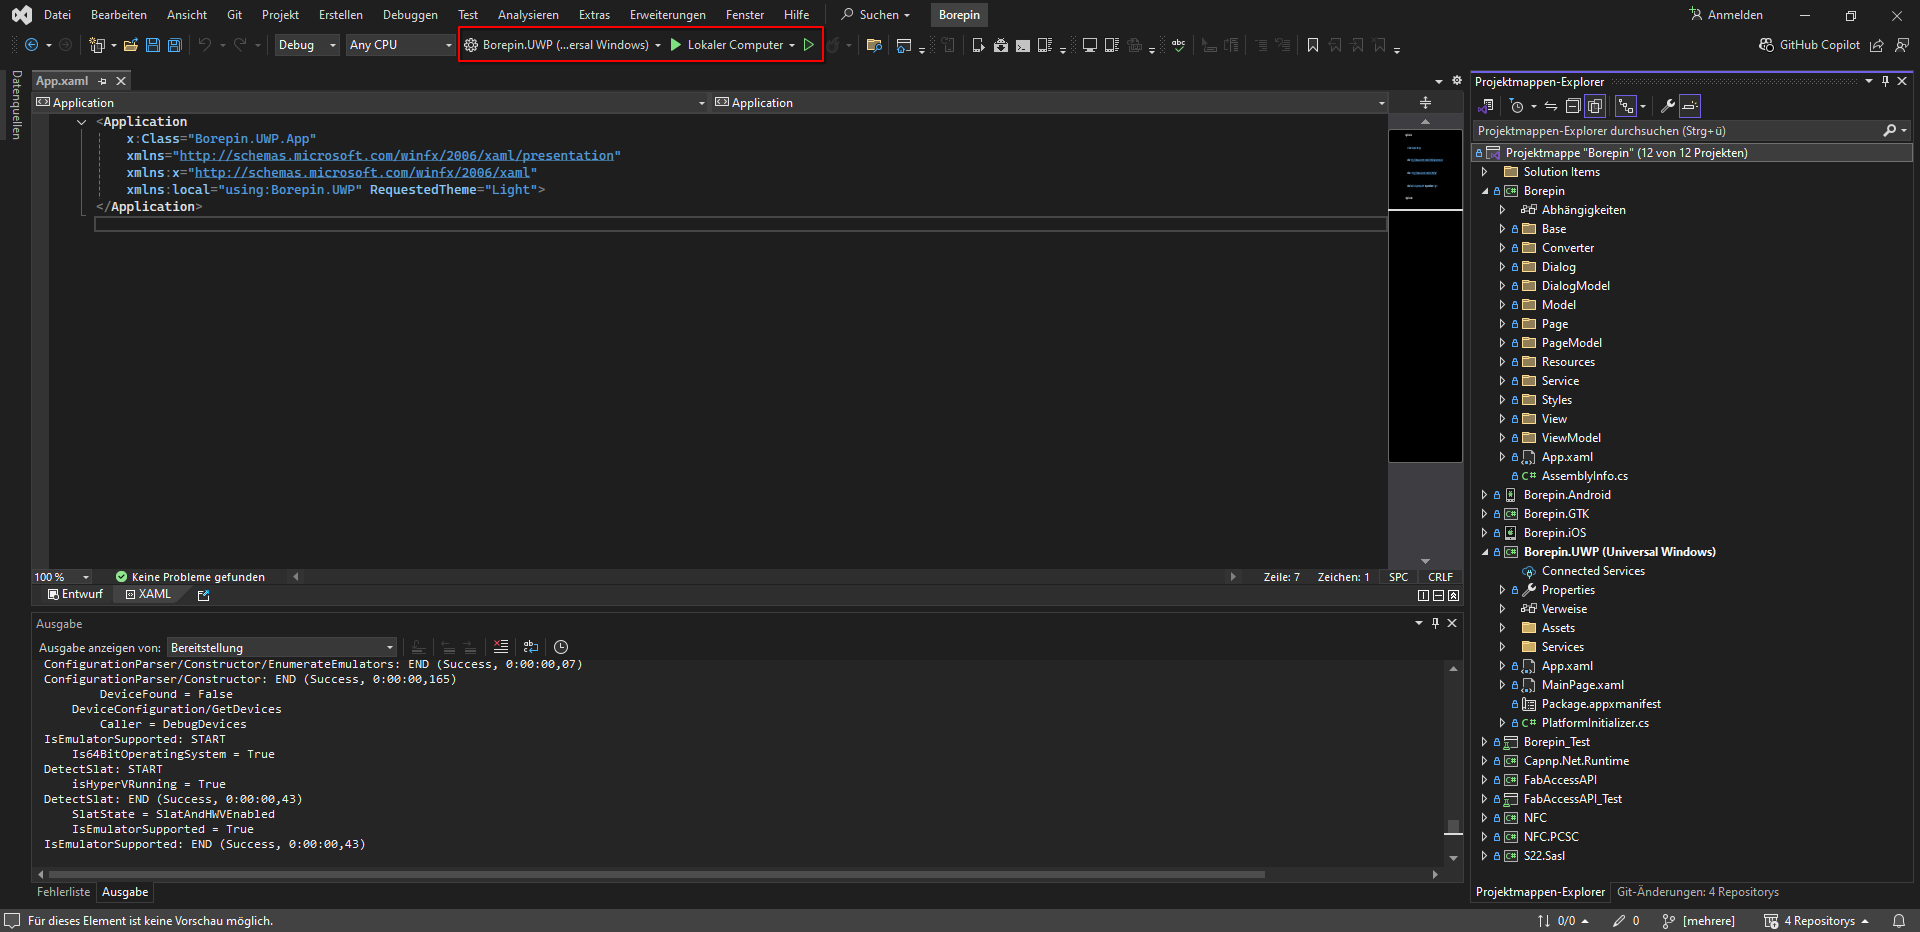
Zielarchitektur (z.B. x86, x64, arm) und Ausgabetype (Debug, Release) können in der oberen Leiste ausgewählt werden:
[](https://docs.fab-access.org/uploads/images/gallery/2024-12/HpFUdTOJIbwXxmUt-grafik.png)
Über den kleinen grünen Play-Button können wir das Projekt schlussendlich compilen. Dieser Vorgang dauert u.U. ca. 5-10 Minuten. Zeit für eine kurze Kaffeepause ☕.
Das fertige Kompilat für [UWP](https://docs.fab-access.org/books/awesome-fabinfra/page/glossar-begrifflichkeiten-und-abkurzungen#bkmrk-uwp-%28universal-windo "Glossar (Begrifflichkeiten und Abkürzungen)") wird dann beispielsweise in `\Borepin\Borepin.UWP\bin\x86\Debug\` abgelegt. Dieses ist **nicht** standlone ausführbar. Das heißt, dass wir dafür Visual Studio benötigen. Für eine distributierbare (veröffentlichte) Version als \*.appx-Format siehe Kapitel [App veröffentlichen (Standalone Anwendung lokal installieren via "Sideload")](#bkmrk-app-ver%C3%B6ffentlichen-).
Bei etwaigen Kompilierproblemen wird ein Systemneustart empfohlen, falls die obigen Abhängigkeiten erstmalig installiert wurden.
### App veröffentlichen (Standalone Anwendung lokal installieren via "Sideload")
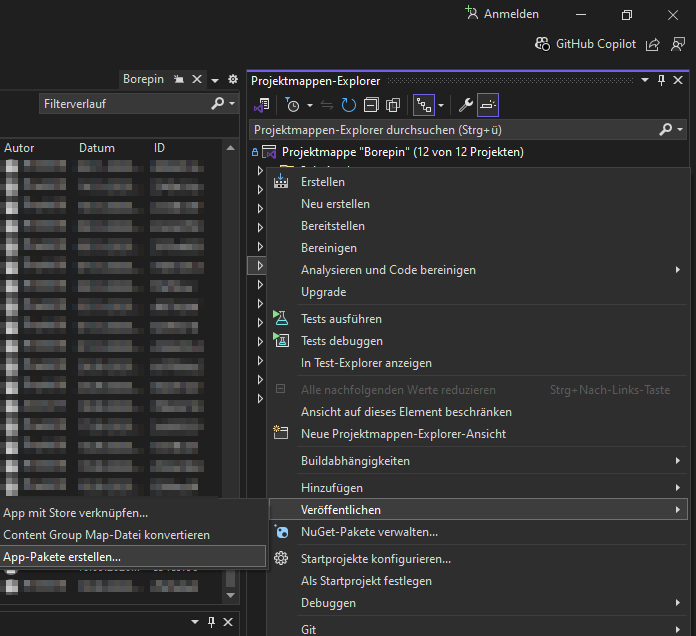
Zum Publishen von Borepin wählen wir rechts im Projektstrukturbaum `Borepin.UWP` aus und klicken rechts auf `Veröffentlichen`→ `App-Pakete erstellen ...`. Dabei erstellen wir ein App-Paket vom Typ `Querladen` (Sideload) und klicken uns mit den Standardwerten durch. Nachdem wir den Button `Erstellen` klicken geht der Prozess los. Dieser dauert je nach Hardwareressourcen 10 - 15 Minuten. Zeit für noch eine gute Kaffeepause ☕.
[](https://docs.fab-access.org/uploads/images/gallery/2024-12/1cieJQ3q5W6KHSo5-grafik.png) [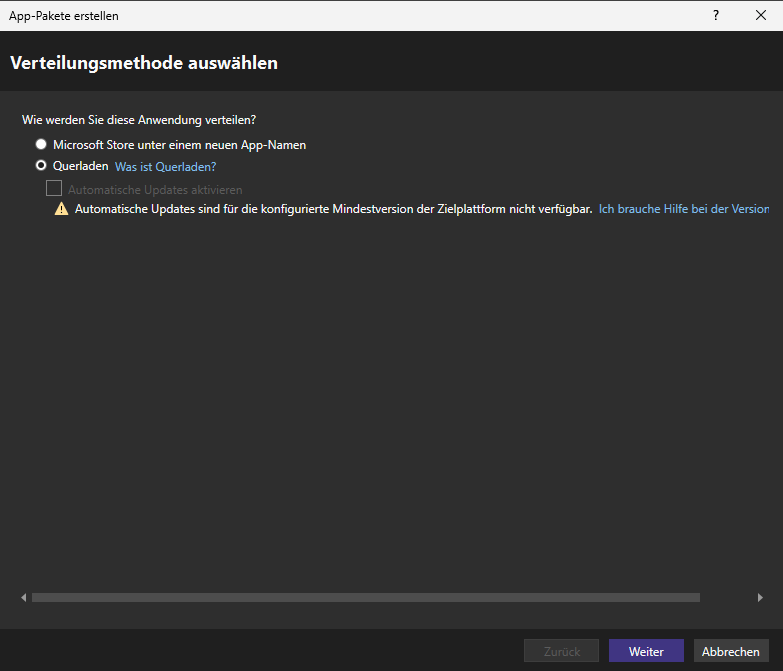](https://docs.fab-access.org/uploads/images/gallery/2024-12/e4NJvKMSA0UQqXjs-grafik.png) [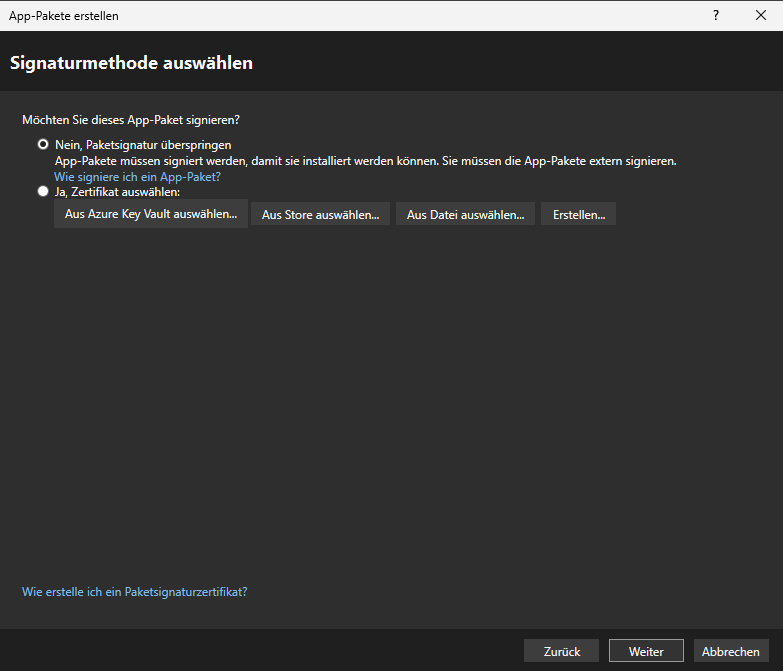](https://docs.fab-access.org/uploads/images/gallery/2024-12/qsBnvNLKW8x1vanK-grafik.png) [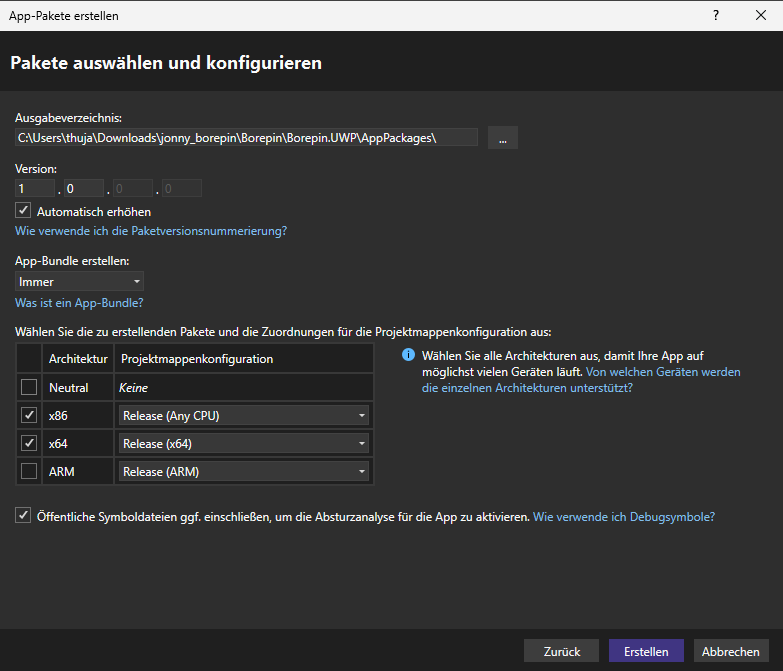](https://docs.fab-access.org/uploads/images/gallery/2024-12/CaFXbTEwMLeMbJzz-grafik.png)
Das fertige App-Paket befindet sich dann unter `\Borepin\Borepin.UWP\AppPackages\Borepin.UWP_1.0.0.0_Test\`.
[](https://docs.fab-access.org/uploads/images/gallery/2025-02/P7Mha1Sp6yQKN2jf-grafik.png)
Dieser Ordner hält für die Installation folgende für uns relevanten Dateien bereit, die wir ausführen müssen (PowerShell). Als zusätzliche kleine Hürde muss dafür jedoch noch eine Policy **einmalig** ausgehebelt werden (siehe [https:/go.microsoft.com/fwlink/?LinkID=135170](https://docs.fab-access.org/https:/go.microsoft.com/fwlink/?LinkID=135170)).
Wir starten eine als Administrator privilegierte Shell und führen im Verzeichnis des App-Pakets aus:
```
Set-ExecutionPolicy -ExecutionPolicy Unrestricted -Scope CurrentUser
```
Dann können wir das Paket installieren:
```
.\Add-AppDevPackage.ps1
.\Install.ps1
```
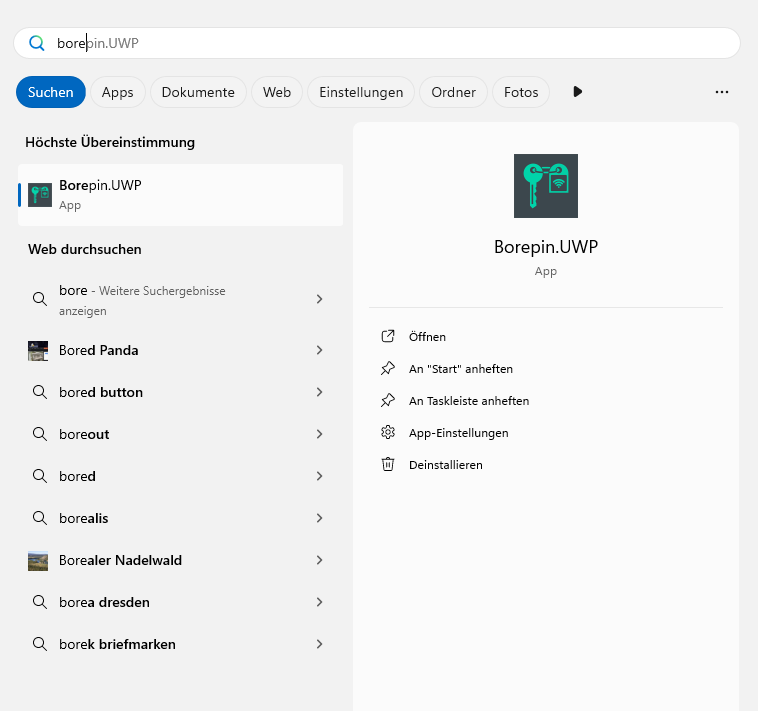
Letztendlich finden wir die installierte Testversion dann im Startmenü:
[](https://docs.fab-access.org/uploads/images/gallery/2024-12/DrCImi35Nw6h7Kdi-bildschirmfoto-20241229-172325.png) [](https://docs.fab-access.org/uploads/images/gallery/2024-12/hbyyBd6BZLjeXcWe-bildschirmfoto-20241229-172416.png)
## macOS / iOS
Der Kompilierprozess ist ähnlich zu Windows, da wir auch für macOS Visual Studio installieren können. Allerdings wurde Visual Studio zum 31.08.2024 von Microsoft [offiziell abgekündigt](https://learn.microsoft.com/en-us/visualstudio/releases/2022/what-happened-to-vs-for-mac). Es wird nur noch [Visual Studio Code](https://code.visualstudio.com/docs/csharp/get-started) (kurz: *VS Code)* unterstützt.
### Installation von Cap'n Proto
```bash
brew install capnproto
```
Nach dem Installieren muss u.U. die capnp Binary per Symlink in `/usr/local/bin` oder in `$PATH` eingebettet werden.
Weitere Details für macOS / iOS sind aus Mangel an Support derzeit nicht vorhanden. Wir freuen uns über entsprechende Zuarbeiten.
## Linux GTK
Auf Linux benötigen wir das große Paket für [Mono](https://www.mono-project.com/download/stable/#download-lin). Mono ist eine alternative, quelloffene Implementierung von Microsofts .NET Framework. Sie ermöglicht die Entwicklung von plattformunabhängiger Software auf den Standards der Common Language Infrastructure und der Programmiersprache C#.
Wir arbeiten hier nicht mit einer IDE, sondern direkt von Kommandozeile. Wer eine IDE testen möchte, der kann [MonoDevelop](https://www.monodevelop.com/download/) oder [JetBrains Rider](https://www.jetbrains.com/rider/) ausprobieren.
### Ubuntu 24 LTS
Auf Ubuntu 24 LTS gehen wir wie folgt vor:
```559222
# Mono Repository hinzufügen
sudo apt install ca-certificates gnupg
sudo gpg --homedir /tmp --no-default-keyring --keyring /usr/share/keyrings/mono-official-archive-keyring.gpg --keyserver hkp://keyserver.ubuntu.com:80 --recv-keys 3FA7E0328081BFF6A14DA29AA6A19B38D3D831EF
echo "deb [signed-by=/usr/share/keyrings/mono-official-archive-keyring.gpg] https://download.mono-project.com/repo/ubuntu stable-focal main" | sudo tee /etc/apt/sources.list.d/mono-official-stable.list
sudo apt update
# Mono und weitere Pakete installieren
sudo apt install mono-complete gtk-sharp2 libcanberra-gtk-module nuget capnproto git
```
```bash
nuget update -self
```
Projekt klonen
```bash
cd ~/
git clone https://gitlab.com/fabinfra/fabaccess/borepin.git --recurse-submodules
cd borepin/
```
Unbenötigte Projekte entladen/entfernen. Wir benötigen in unserem Fall nur Borepin.GTK
```108222
# Entfernen, was wir nicht brauchen
rm -rf ./Borepin/Borepin.Android/
rm -rf ./Borepin/Borepin.UWP/
rm -rf ./Borepin/Borepin.iOS/
rm -rf ./Borepin/Borepin.macOS/
rm -rf ./Borepin_Test/
rm -rf ./FabAccessAPI_Test/
# diese Einträge entfernen wir außerdem in:
vim Borepin.sln
nuget restore
```
Projekt kompilieren
```550768
msbuild /restore
msbuild -p:Configuration=Debug -t:Borepin_GTK
```
Borepin starten
```bash
cd ~/client/Borepin/Borepin.GTK/bin/Debug/
# mit "mono" vorangestellt
mono ./Borepin.GTK.exe
# oder direkt
./Borepin.GTK.exe
```
**Das konnte aktuell nicht erfolgreich durchgeführt werden! Der StackTrace:**
```bash
(Borepin.GTK:4704): Gtk-WARNING **: 01:31:17.439: Im Modulpfad »adwaita« konnte keine Themen-Engine gefunden werden,
Exception in Gtk# callback delegate
Note: Applications can use GLib.ExceptionManager.UnhandledException to handle the exception.
System.NullReferenceException: Object reference not set to an instance of an object
at Xamarin.Forms.Platform.GTK.Platform.GetRenderer (Xamarin.Forms.VisualElement element) [0x00000] in :0
at Xamarin.Forms.Platform.GTK.FormsWindow.OnConfigureEvent (Gdk.EventConfigure evnt) [0x00033] in :0
at Gtk.Widget.configureevent_cb (System.IntPtr widget, System.IntPtr evnt) [0x00014] in <7aab76e87bce48a4b45cf7fa613cb70c>:0
at GLib.ExceptionManager.RaiseUnhandledException (System.Exception e, System.Boolean is_terminal) [0x00000] in :0
at Gtk.Widget.configureevent_cb (System.IntPtr widget, System.IntPtr evnt) [0x00000] in <7aab76e87bce48a4b45cf7fa613cb70c>:0
at Gtk.Application.gtk_main () [0x00000] in <7aab76e87bce48a4b45cf7fa613cb70c>:0
at Gtk.Application.Run () [0x00000] in <7aab76e87bce48a4b45cf7fa613cb70c>:0
at Borepin.GTK.MainClass.Main (System.String[] args) [0x00000] in <674198d89d1447e7b051f706516309ae>:0
```
Das Ausführen mit [Wine](https://www.winehq.org/), winetricks und dotnet45 ist leider ebenso nicht erfolgreich.
```bash
sudo apt install wine winetricks
winetricks dotnet45
#Borepin starten
wine ~/client/Borepin/Borepin.GTK/bin/Debug/Borepin.GTK.exe
```
### ArchLinux
```bash
pacman -S mono mono-msbuild gtk-sharp-2 nuget capnproto
```
## Android
Diese Anleitung beschreibt, wie ein Cross-Compile für Android auf einem Windows-Betriebssystem gelingt.
Mögliche IDEs sind JetBrains Rider oder Microsoft Visual Studio. Wir verwenden in dieser Dokumentation Visual Studio 2022 (mit .dotNET 7 und Xamarin). Siehe [Installation von Microsoft Visual Studio 2022 Community Edition](#bkmrk-installation-von-mic). Für JetBrains Rider wird das Plugin [https://github.com/Flying--Dutchman/RiderXamarinAndroid](https://github.com/Flying--Dutchman/RiderXamarinAndroid) benötigt.
### Schritte (verkürzt)
- Borepin Projekt mit Git klonen
- capnproto Executable in %PATH% einfügen
- nuget via chocolatey installieren
- [Android Studio](https://developer.android.com/studio?hl=de) installieren
- [Android SDK für Android 11](https://developer.android.com/about/versions/11/setup-sdk?hl=de)
- Klicken Sie auf Tools → SDK-Manager → Paketdetails anzeigen
- Maximieren Sie auf dem Tab SDK-Plattformen den Bereich Android 11.0 („R“) und wählen Sie das Paket Android SDK-Plattform 30 aus
- Maximieren Sie auf dem Tab SDK-Tools den Bereich Android SDK Build-Tools 34 und wählen Sie die neueste `30.x.x`-Version aus.
- Klicken Sie auf Übernehmen → OK, um die ausgewählten Pakete herunterzuladen und zu installieren
- [Android NDK](https://developer.android.com/ndk/downloads?hl=de)
- Java 17 ([Microsoft OpenJDK 17](https://learn.microsoft.com/de-de/java/openjdk/download)) installieren
- In Visual Studio
- Tools → Options → Xamarin/Android Settings → die passende, soeben installierte Java Version und ggf. SDKs auswählen
- Entladen Sie die Projekte Borepin.iOS, Borepin.UWP und Borepin.macOS, um Fehler zu vermeiden, die Ihren Build abbrechen
- Projekt Borepin.Android auswählen und kompilieren
## Testing
Dafür nutzen wir [NUnit](https://nunit.org). NUnit ist ein Unit-Testing-Framework für alle .Net-Sprachen. Ursprünglich von JUnit portiert, wurde es mit vielen neuen Funktionen und Unterstützung für eine breite Palette von .NET-Plattformen komplett neu geschrieben.